
Most homeowners don’t think about their roof until there’s a problem. Chances are, you are asking, “When do you need a roof tarping and its average cost?” The answer to this question depends on the severity of the damage to your roof. For example, if your roof has been damaged by severe weather, it is likely that you will need to have it tarped in order to prevent further damage.
The easiest way to explain the average cost to tarp a roof:
Between $400 and $1500 is the average cost of tarping a roof (for a 1000 square foot roof that is easily accessible).
Now, certain factors will affect this cost. So, our questions for you are:
-
Are you planning to do it yourself?
-
If you are a DIYer, do you already have the materials needed to properly secure a tarp?
-
Are you more comfortable with hiring a licensed professional? (safe & recommended)
-
Is it an emergency?
-
How big is the area you are needing tarped?
What is a Roof Covering?
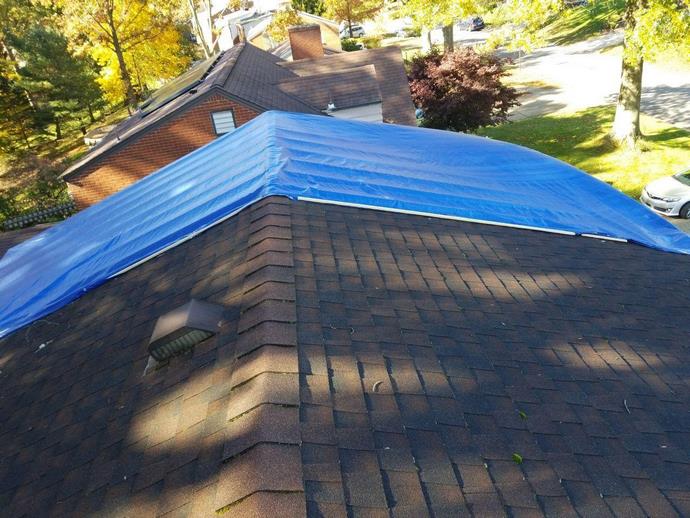
Roof covering (a.k.a. tarp) can be used for roofing in many ways. It can be fastened down over a frame, used as a roof on a temporary structure, or placed over a damaged roof to protect it from even more damage (unfavorable weather elements). Tarps are also a great way to cover a roof when you are doing repairs.
Although a tarp can be used in a pinch, it is not recommended for a long-term solution due to its inability to withstand the weight of snow or rain.
Roof Covering Types
Choosing the right tarp for your roofing project can be a challenge. For example, there are many types of tarps available on the market today. They come in a variety of sizes, shapes, and materials:
Polyethylene tarps: These tarps are made from a strong, durable plastic.
PVC tarps: PVC tarps are made from a tough, waterproof material.
Canvas tarps: Canvas tarps are made from a strong, durable fabric. They are heavy duty and can withstand heavy winds.
Vinyl tarps: Vinyl tarps are tough, strong, and waterproof.
When & How to Tarp Your Roof
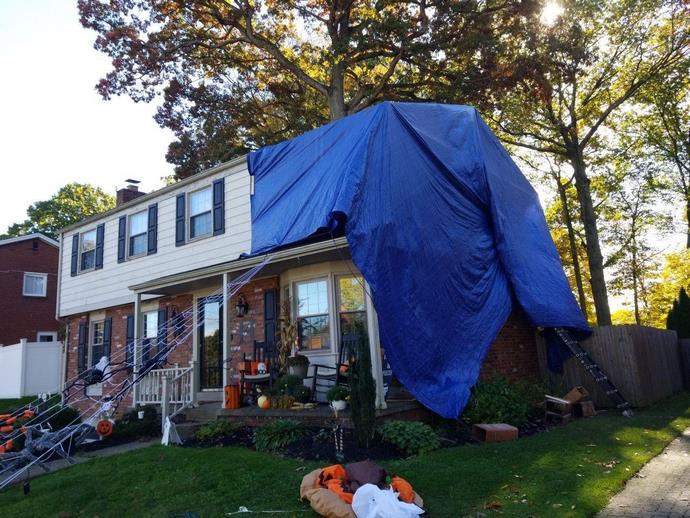
Why tarp a roof? In a nutshell, it’s typically used when customers are trying to figure out leak in roof what to do to prevent damage from inclement weather while waiting for roof repairs to be completed.
During most emergency situations, customers needing a temporary solution will always ask, “Quick! What to do with a leaking roof?”
What to Do if Roof is Leaking (before tarping)
If you have a leaking roof, there are a few temporary solutions that can help you until you can get it fixed.
- Try to find the source of the leak.
- You can buy a tarp at any hardware store, and they’re relatively easy to install.
- Just make sure to secure the tarp well so that it doesn’t blow away in the wind.
How to Tarp a Roof Yourself

Can you install a roof tarp by yourself? Sure. Should you? No.
If you are an amateur, we cannot (and would never) recommend you DIYing a roof repair (whether temporary or not). It’s just not safe. Ultimately, though, it’s your choice.
Crucial safety tips include:
- Never tarp when it’s windy or raining.
- Always wear protective gear (protective clothing, gloves, goggles, boots, etc…).
- Never climb on a roof without a safety harness.
- Watch out for power lines or electrical gear.
- Beware of trip hazards like cables and satellite dishes.
- After putting the tarp in place, NEVER walk on the tarp itself. The material is too slick.
Buying the tarp is easy enough, but most customers do not understand the size of tarp needed nor do they find themselves not having the materials needed to ensure the tarp is secure.
Get Organized | Materials Needed for Tarping Roof Damage
- Camera or Smartphone
- Cap Nails
- Correct Tarp Size
- Drill
- Gloves
- Goggles
- Ladder
- Long Screws
- Plywood
- Protective Clothing
- Sandbags
- Saw
- Screw Gun
- Sturdy Boots
- Tape Measure
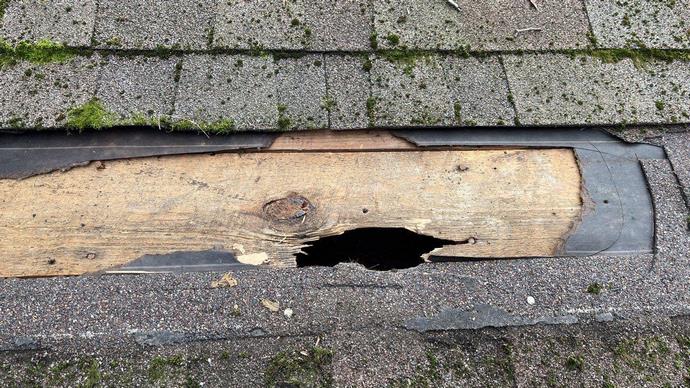
Inspect the Damage & Take Pictures
Examine whatever damage led you to needing the roof tarped. At this point, you probably already have evidence there is a leak. For example, your ceiling may be leaking this very moment. Naturally, you will want to check above the problemed area.
- Look for missing, cracked, or damaged shingles above any leak you may be faced with right now.
- Also look for water stains on the rafters or leaking around the chimney.
- Check the attic (it’s the easiest way to examine under the roof sheathing).
- Take a picture with a Smartphone or camera in case you need it for insurance purposes.
Measure the Perimeter of Damage
It’s important to accurately measure the perimeter of roof damage with a tape measure when you’re making repairs. This will ensure that you have the right materials and that the repairs will be effective.
How to Pick & Place the Tarp (and estimate the cost involved)
We’ve already pointed out the types of tarps that are available. However, when it comes to picking out the right tarp to cover your roof, it also involves choosing the right size. It is imperative that the tarp is big enough to cover the roof damage.
Sizing Tips
There are a variety of tarp sizes that range as small as 5’x7’ all the way up to 20’x40’.
Roof tarps should always extend past the damage by at least 8 feet – this way you have 4 feet extra on each end. And, in some cases, it’s best to have the tarp hanging over the ridge of the roof. So, you’ll want to add to the measurements you’ve already obtained.
Cost Estimate & Quality Tips
- Cost: Tarping costs $1-$2 per square feet (tarp only – not other materials you may need to buy).
- Weight: 5-6 mil thickness is best for roof tarping.
- Weather Resistant: Rainproof and UV-resistant coating is a must.
- Mildew-Proof: Prevent mold by choosing material that resists it.
- Rust-Proof: Prevent rust by ensuring the grommets on the tarp will not rust.
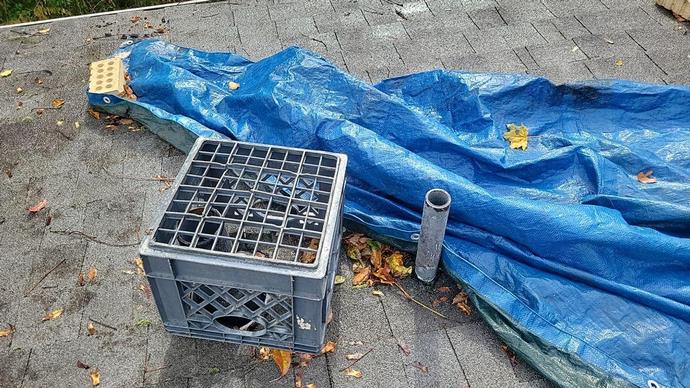
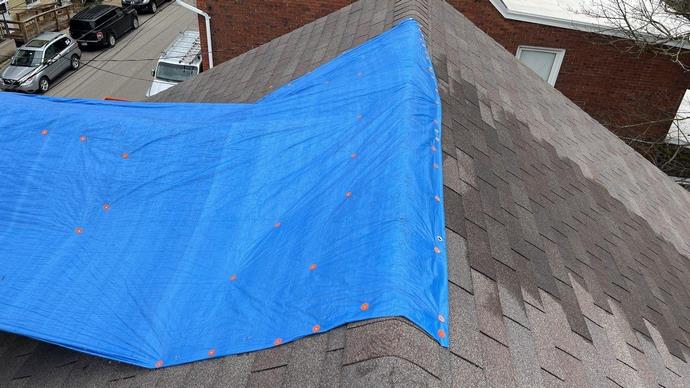
Prep & Place the Tarp
Never work alone to position a tarp on a roof. Get acquainted with the following steps to ensure proper placement.
- Correctly secure the tarp first by using sandbags to weight it down.
- Tarp-roll boards by rolling the peak end of the tarp around a 2×4 inch board
- Use another 2×4 inch board to sandwich the tarp, ensuring tautness.
- Repeat the process for the remaining peak ends.
- Use a screw gun to secure the tarp by screwing through all tarp-rolled boards.
- Use the longer screws to screw all the way through to the tarp, board, shingles, and then into the decking of the roof.
- Use additional 2×4 inch boards to secure the remaining sides of the tarp by using a screw gun and screws. These boards do not have to be tarp-rolled.
When to Talk to a Qualified Roofing Professional About Tarping Your Roof
If you’re unsure whether you need to tarp your roof or not, don’t hesitate to reach out to a qualified roofer for guidance. They can help you make the best decision for your home and ensure that your roof is well-protected.
Overall Costs to Keep in Mind (Depending on Size & Circumstances)
When speaking to a qualified professional, you will want to have approximate pricing in mind to compare.
- We’ve already learned tarping can cost $1-$2 per square foot.
- Labor can cost anywhere from $300 to $700+ depending on a variety of factors. For example, a 20×20 tarp may cost more than a smaller tarp size.
- Are you needing tarp service during normal business hours? If so, you can keep your cost down on the lower end of the spectrum ($500ish).
- If it’s an emergency, and the roofing company has emergency hours, you can expect the cost to be more on the higher end of the spectrum ($700 give or take).
- Oh, and let’s not forget the material cost. This can be a broad range depending on the tools you already have vs. what a roof contractor already has. If you do not have any tools at all, the cost could skyrocket you to a few hundred dollars, at the very least (especially if you do not already have a drill or saw).
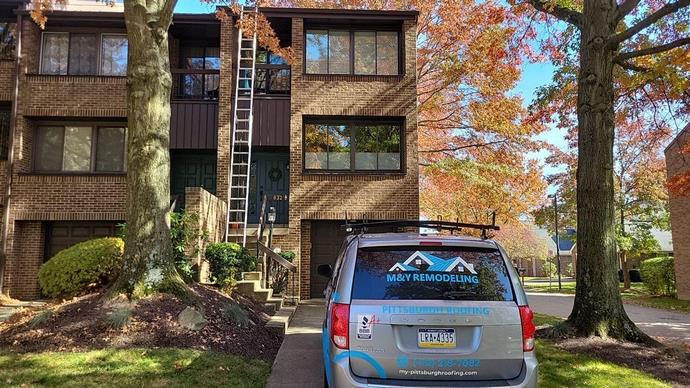
Here at MY PITTSBURGH ROOFING, we are dedicated to sharing with you the cost of tarping a roof and give free estimates for roof tarping services. Remember, it never hurts to get an estimate before tackling the work yourself. You just may find it saves you time AND money. The least you can do is compare without making a commitment.